From Tom McBride:
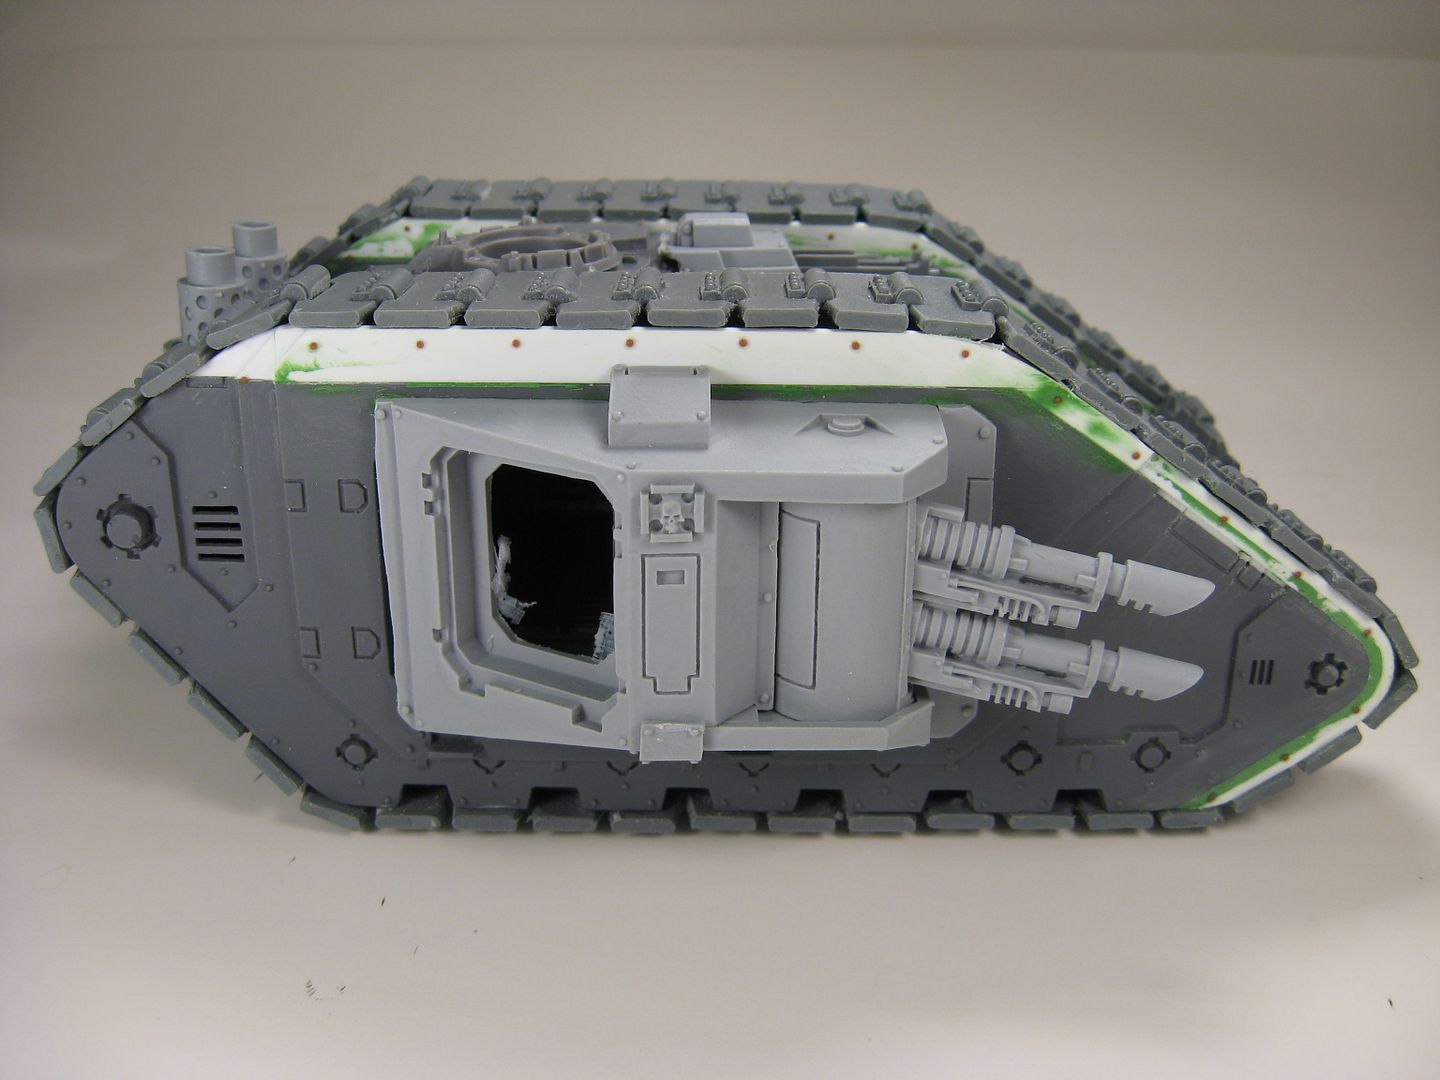
Since doing this project I was asked a number of times to do a tutorial on how to replace the standard treads with my Liberator Pattern 1.0s (you can also use the same process with the Oppressor or Krusher Pattern 1.0s). Well I finally got around to building another one (for the same customer no less) and I documented the whole process as best as I could. So here we go.
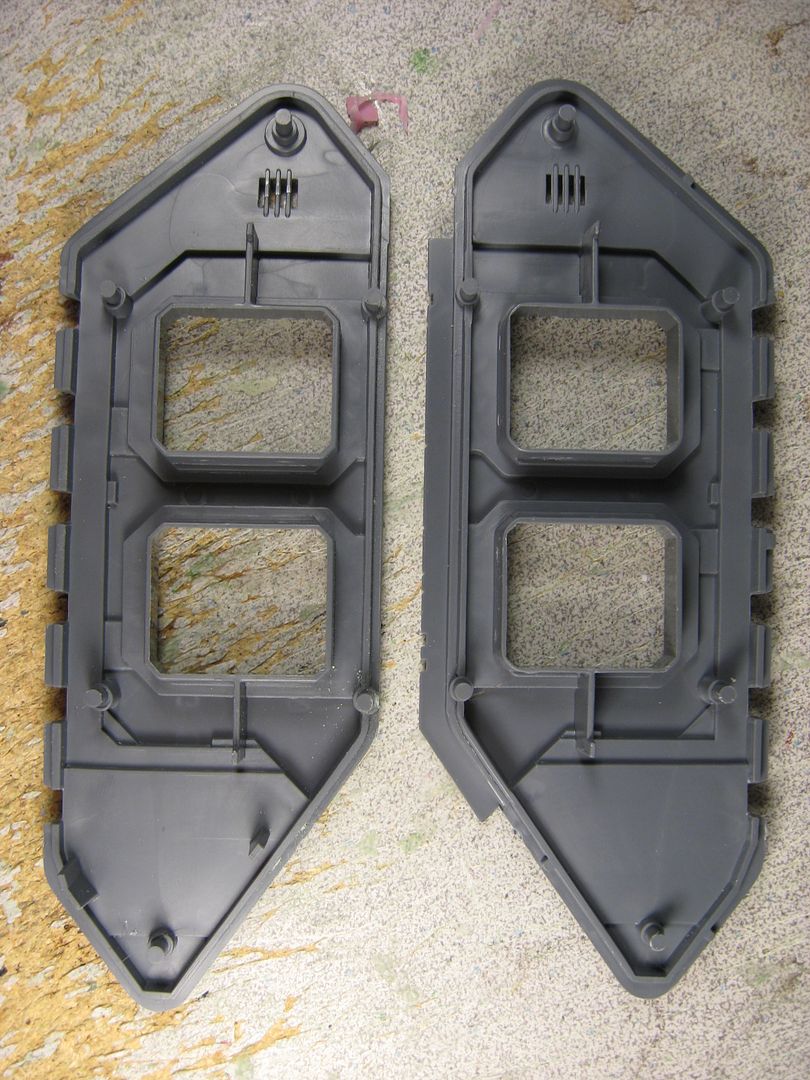
First up you want to remove the ridge that runs along the top of the outer track plates of the Land Raider so that you have a flat surface going all the way across.
Also on the outer track plates there is a recessed portion on the angled front portion that needs to be raised up so that it is flush with the rest of the edge. I did this by gluing a 0.03x0.06 inch strip of plasticard. I them patched it and cut the grooves in it so that it matched.
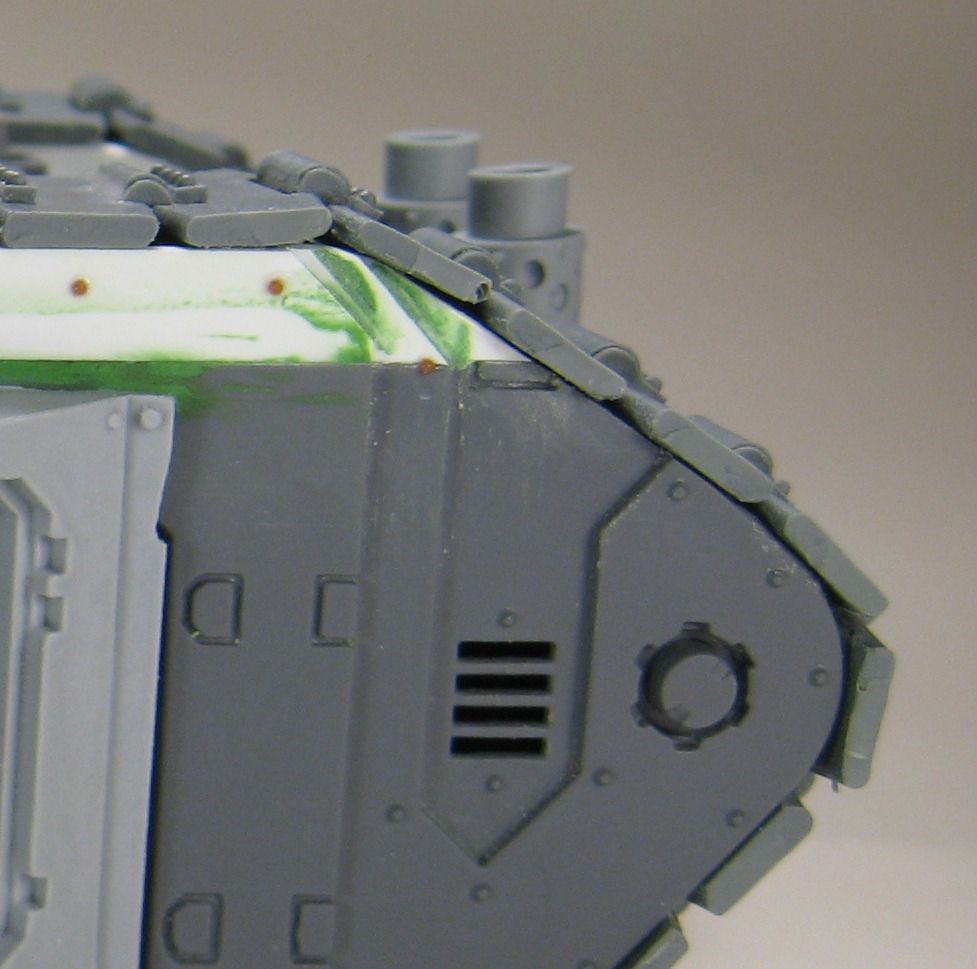
Next you need to increase the radius at the front of the track section so that the larger treads can smoothly go around. I did this by gluing two strips of 0.060x0.125 inch plasticard (or you can use one strip of 0.125x0.125) along the entire front section. You want to do this on all four track plates.
In order for the wrap around treads to clear along the top of the tank they need to be raised up about a 0.25 inches. In this case I glued a 0.25x0.10 inch strip of plasticard along the top of all four plates and made it flush with the outer edge of each plate. I them patched and sanded the joint smooth. You can then assemble the two track sections (don't forget to install the front access ramp and its opening mechanisms. The other thing you will want to do is smooth over the sharp edges where the new plasticard meets the model to that the track has a smooth transition.
As there are some different armor layers on the outer track panels along the back I added a few extra piece of plastic to get them to match. It's not necessary but it a nice touch to get everything to blend together.
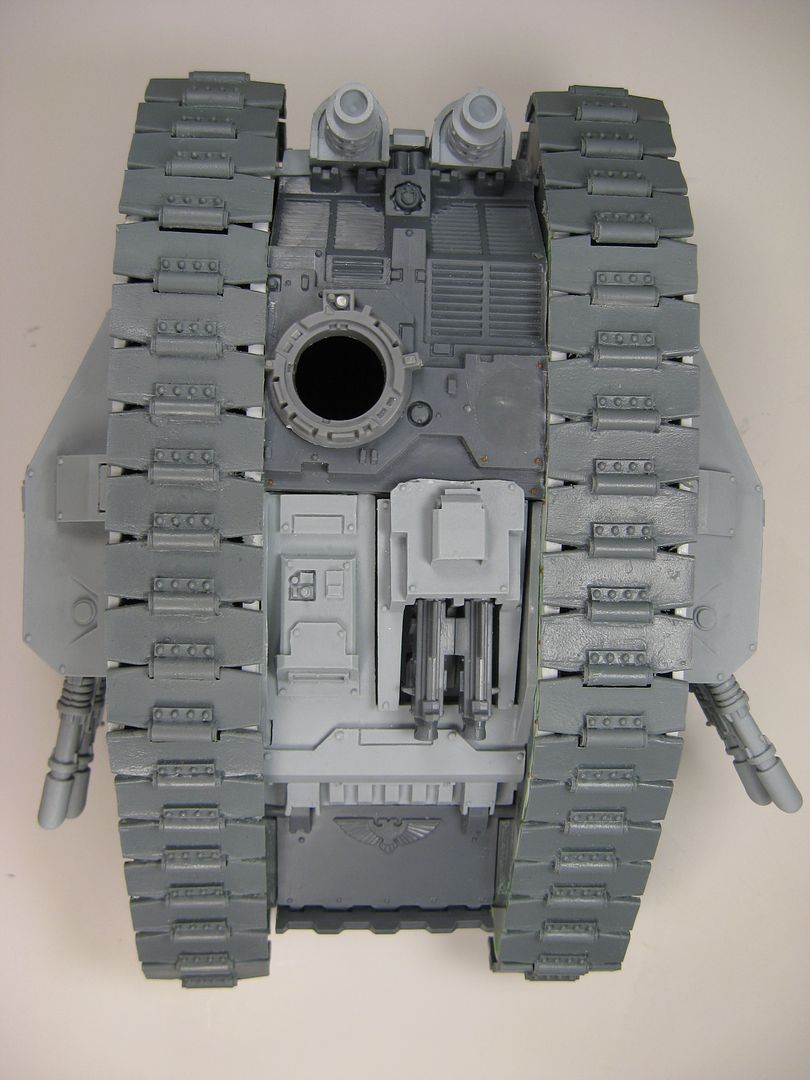
At this point you can begin wrapping the treads all the way around the track sections. I like to start in the very front with a couple of treads and continue along the top and bottom. In all you will need 39 treads per side. The Liberator Pattern 1.0 pack comes with 40 treads so you will need two packs all together (if you decide to use the Oppressor or Krusher Pattern 1.0s you will need a 3rd pack as the treads are shorter). The section I leave to last is the angled area on the rear top of the treads section. As the treads are a little short you will need to sand this area down until you get the two ends to meet. Then the tracks are done!
Lastly you assemble the rest of the model. There will be some tripping to do on the front top plate to remove the part of the tab where there is no longer a slot (if you’re also using the Forgeworld Mk2 kit prepare for a lot of swearing as nothing fits together right). The last modification is to the top plate. As the armored plates above the track sections are no longer needed you just need to trim off the two sides and finish the assembly.
Finally you can add new rivets and the like to finish the look. Then it’s ready for paint!
Hope this all helps :)
Thanks to Tom for putting this article together! You can find his store, where you can buy his custom resin parts, here.
Alec


.jpg)


3 comments:
Now that is awesome! Beautiful work!
Gorgeous! Tutorial saved for future reference.
Hi there ! I'm currently working on the same conversion. I've got a probem : I bought 2 packs of Liberators 1.0 pattern but i can't wrap the all side with 40 treads. When i'm look at your photos, my treads looks smaller than yours. Do you know if the Liberator Pattern has got any changes ?
Thanks !
Post a Comment