A guest post from Kenny Boucher of Next Level Paintng who will be producing a series of articles on painting. Here he starts with a Warhound Titan.
Kenny here from Next Level Painting. We will be posting a series of articles charting the growth and development of one War Hound Titan's journey to bad ass-ness (paint job). I will spare your the hours of details on the assembly process., we are a painting studio after all. :)
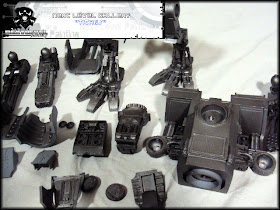
So my assembly guy (Dom aka DJ LMT) slapped this beast together in a few days, but as usual we work together on all projects to maximize the effects of the airbrush. So all panels have been left off as well as the arms and head. We used a series of screws and nuts rather than magnets.
This series of pics shows the priming process and first steps to paint the mechanical elements as well as the undercarriage.
I chose to use gray primer because of how large the model is. I didn’t want a massive build up of paint(paint sticks to gray best) but if you don’t airbrush black primer might be best to help hide the deepest details lack of paint. As far as airbrushing goes, there are several good “miniature painting' options out there. I use an “Iwata Eclipse”. I have heard people recommend “Badger Patriots” and now “Grex airbrushes” are gaining popularity. It seems that any of these brands will do.
Disclaimer: I use almost no “airbrush ready” paints. The years have taught me how to cut and dilute the thick paints. Everyone has a different trick. Alcohol and windex do about the same thing. It adds a liquid the evaporates faster than water. This eliminates runny and watery build ups. I use pure water and a very high PSI in my compressors. This combo drys water very fast and also reduces splatter. It takes much longer to perfect though.
After the primer set I proceeded to paint all the insides and undercarriage with GW “leadbelcher”. I also hit the legs with a solid coat of the same color (might take 2-3 coats). Once the “leadbelcher” fully dried I used GW “ironbreaker” to highlight the darker “leadbelcher” . Next I use Reaper Master Series “harvest brown” followed by Createx “opaque black” to detail and create depth to the metals. I focused on the contact points for the darkest effect, which is a weathered effect that helps create a look of age. This step is 100% airbrush technique. The next step is equally as important to the paint, it is the seal coats.
After the primer set I proceeded to paint all the insides and undercarriage with GW “leadbelcher”. I also hit the legs with a solid coat of the same color (might take 2-3 coats). Once the “leadbelcher” fully dried I used GW “ironbreaker” to highlight the darker “leadbelcher” . Next I use Reaper Master Series “harvest brown” followed by Createx “opaque black” to detail and create depth to the metals. I focused on the contact points for the darkest effect, which is a weathered effect that helps create a look of age. This step is 100% airbrush technique. The next step is equally as important to the paint, it is the seal coats.
I use a simple acrylic gloss seal coat. You want to lay it on thick in 1-2 coats, and once it fully dries you hit it again with a matte coat of your preference. The reason is that gloss protects way more than matte. It creates a shell of protective plastic over the model,which is important for a big heavy model. I will seal the titan many times as the project advance.
Follow the Next Level Painting blog at http://nextlevelpainting.blogspot.com/ and “like” us on FaceBook at http://www.facebook.com/nextlevelpropainting


No comments:
Post a Comment